|
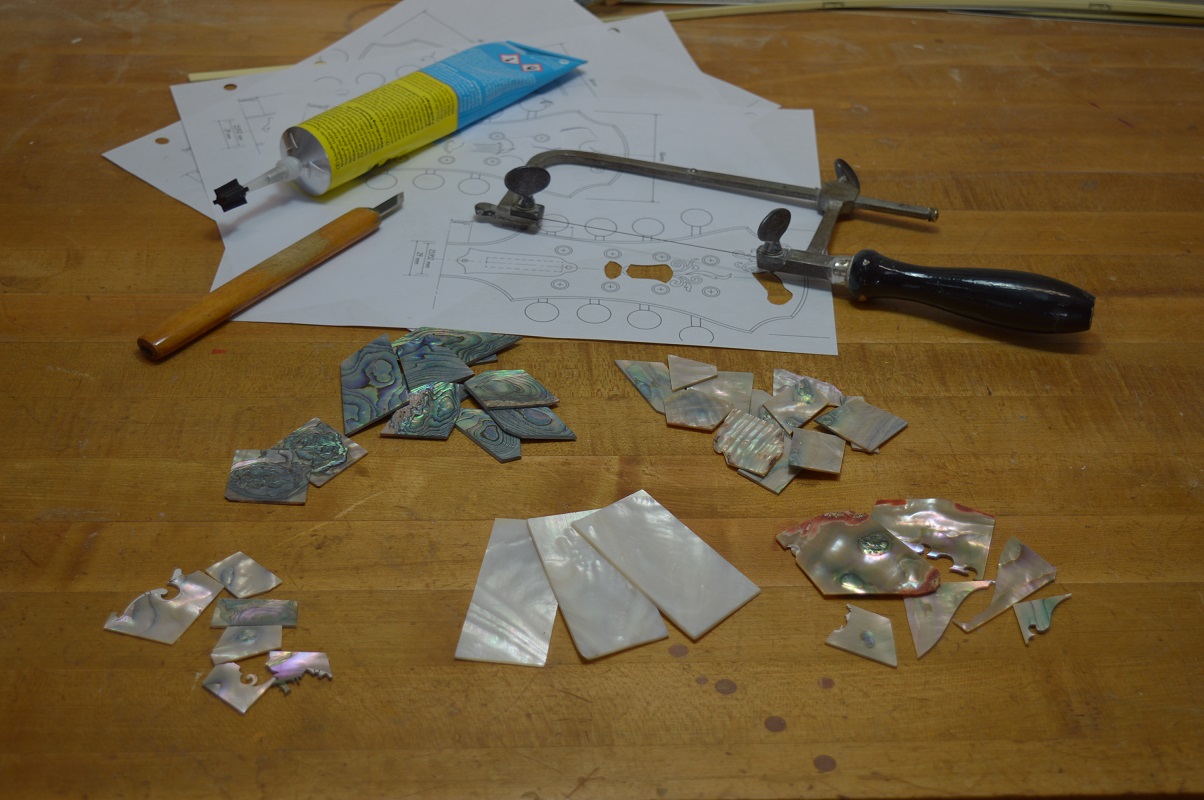
The inlay process begins with selecting the shell pieces to be used. A variety of different shell species are used in my inlays. The type used for each element of the design is carefully selected to enhance the overall look of the design.
|
|
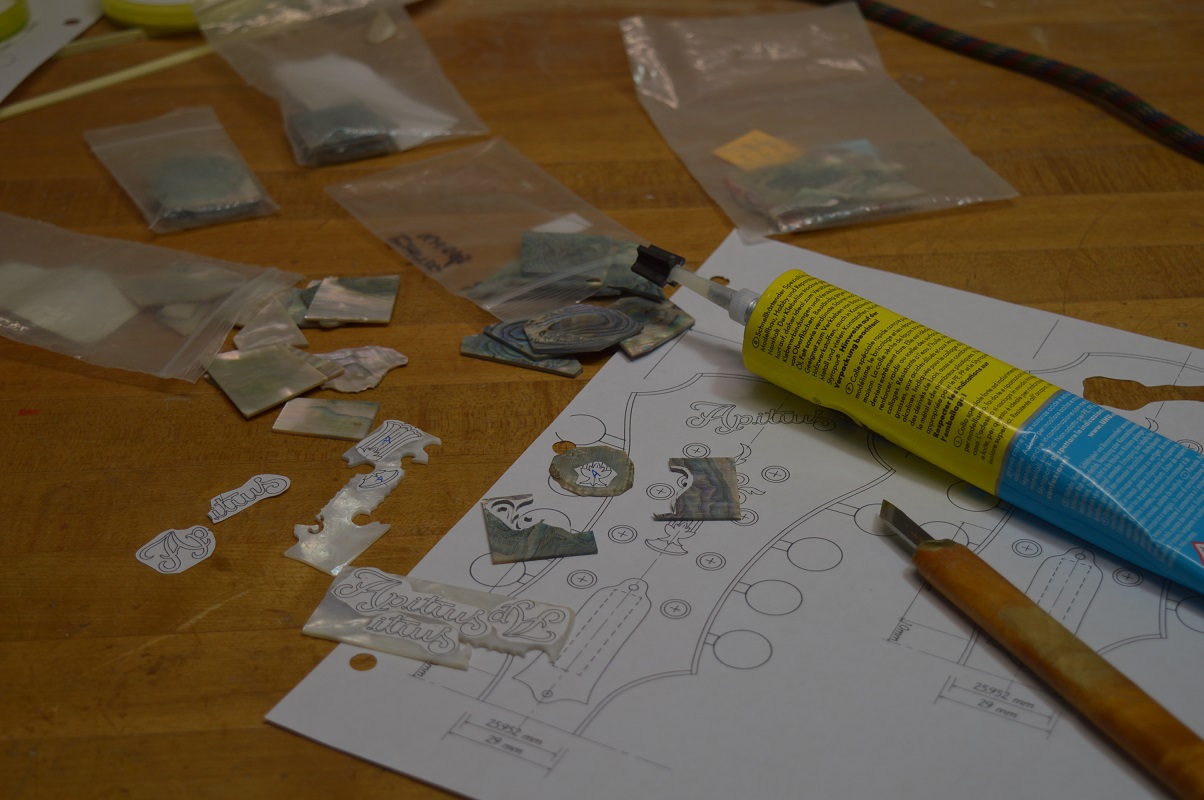
Paper patterns of the various elements of the design are then glued to the pearl shell with model airplane cement.
|
|
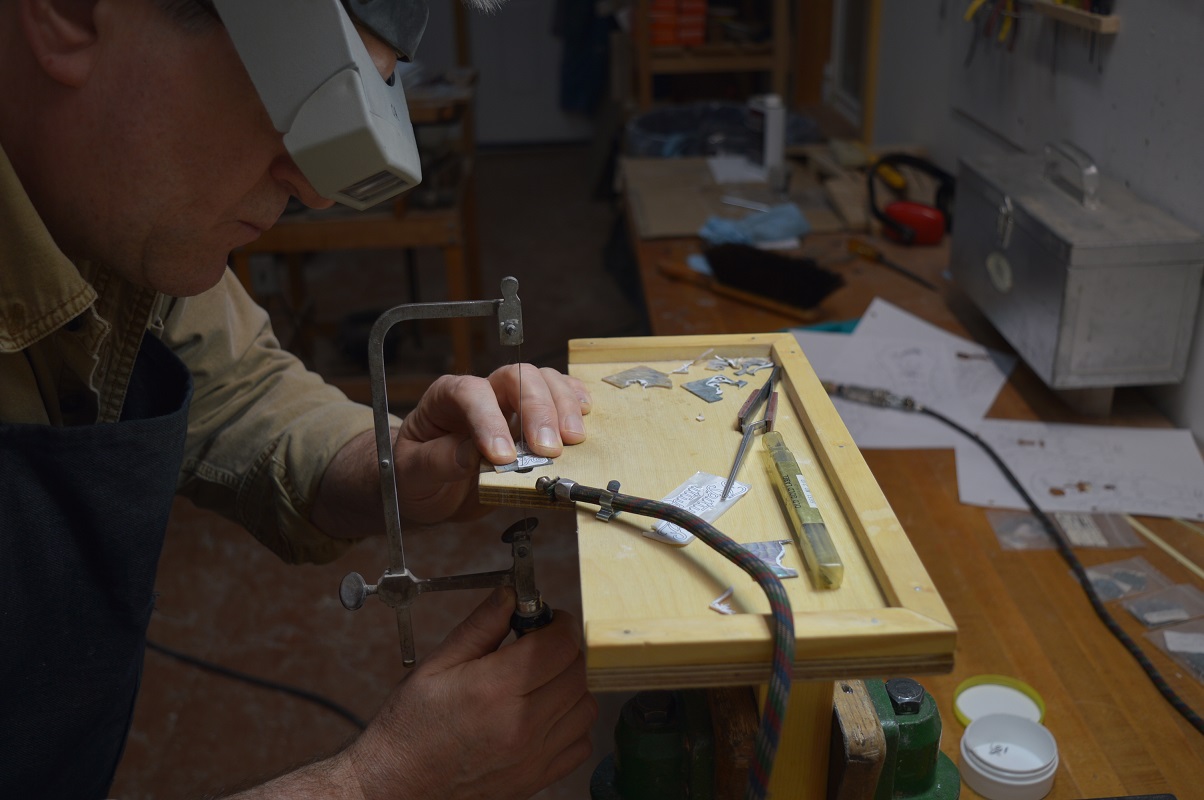
The individual pieces are now carefully sawn by hand using a jeweler's saw fitted with an extremely fine blade. Sawing by hand insures that every inlay is truly unique as there will be tiny variations visable just as there were in the original mandolins of a largely bygone era.
|
|
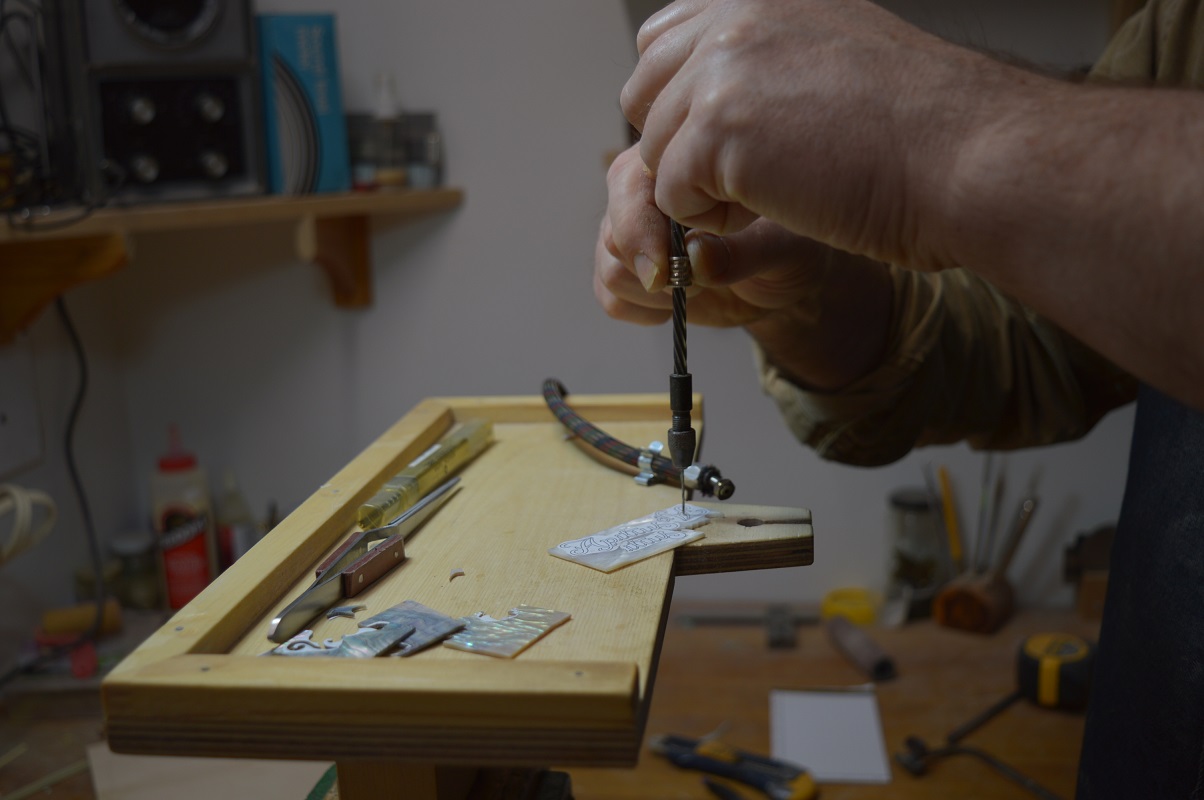
Some of the elements, such as the "A" and the "P" in my script, have inside cut-outs. These must first be drilled with a small jeweler's drill and very fine bit so that the saw blade can be threaded through the hole to create the cut-out.
|
|
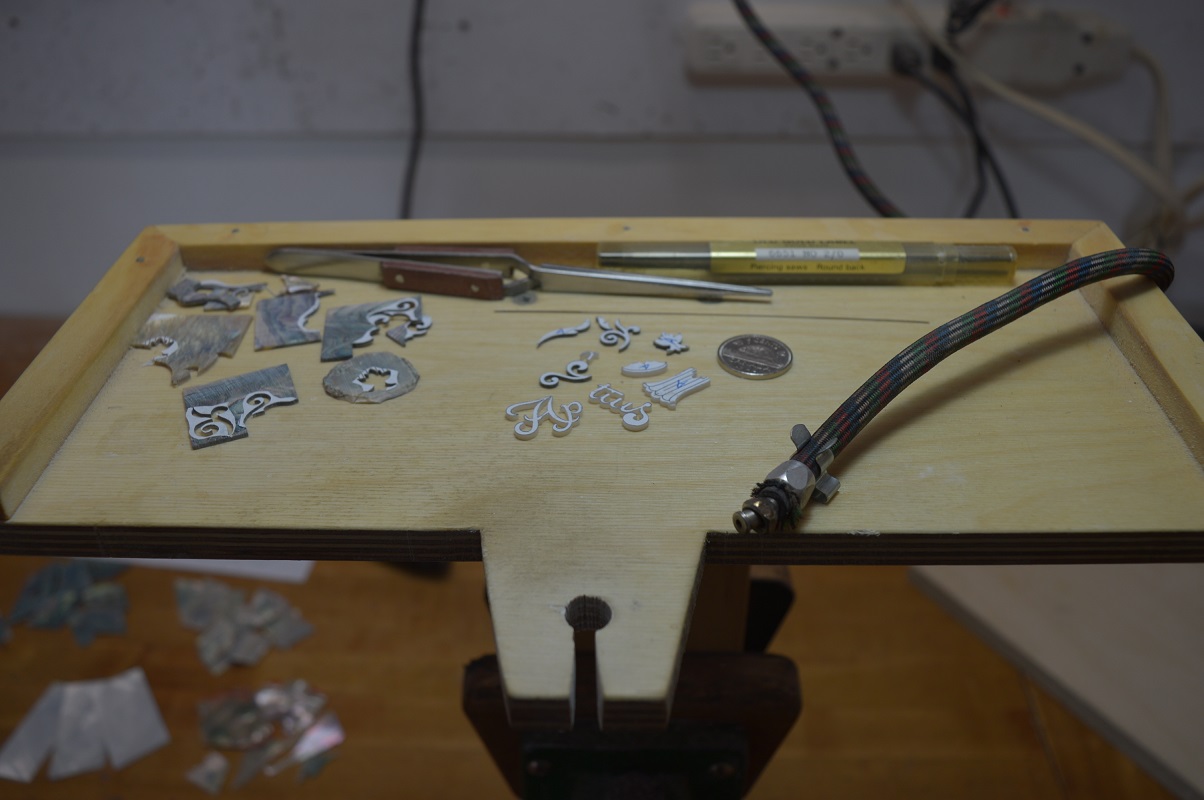
Here's a look at my sawing fixture. The keyhole shaped opening is called a "bird's mouth". It is designed to support the delicate pearl shell while the blade of the saw moves up and down in the round hole. In the background you can see some of the design elements that have been sawn from the shell. The small hose to the right blows a gentle stream of air to keep pearl dust from obscrurring the lines and the beaver nickel is for scale. Also notice the saw blade that rests between the nickel and the forcepts.
|
|
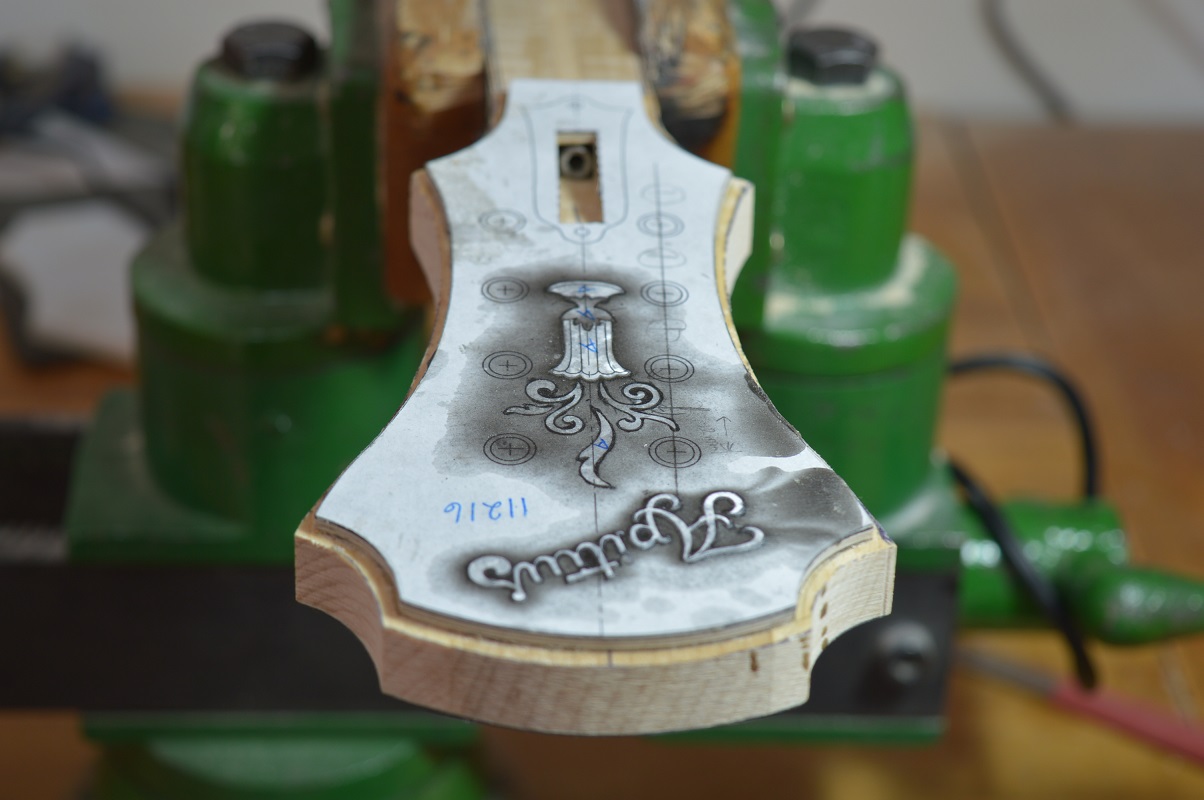
When all of the shell pieces have been cut, a matching cavity is routed into the peghead face using a hand guided rotary tool and a very small bit. The cavity is cut to a depth that is just slightly shallower than the thickness of the shell. In the photo you can see the blueish hose that blows a stream of air to keep the lines of the pattern visable.
|
|
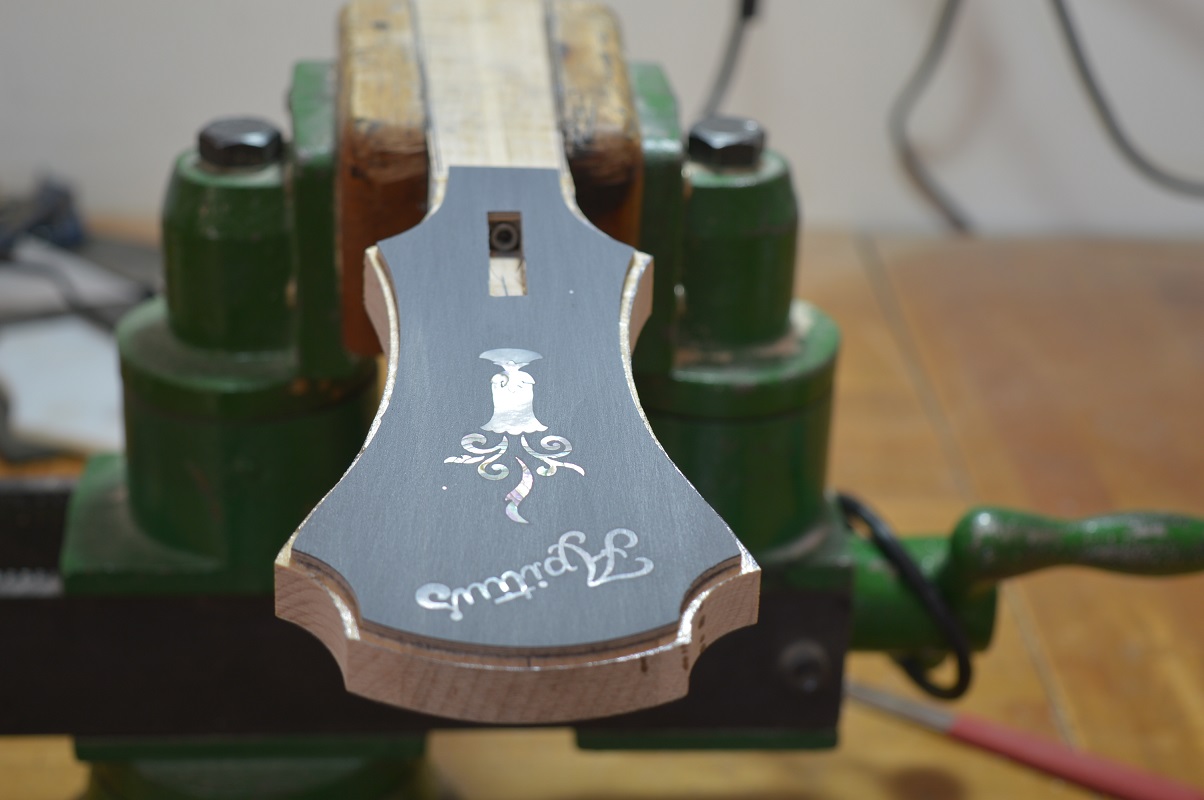
When the routing is complete, the shell pieces are glued in place with epoxy that has some black pigment added to it. After the epoxy has set hard, the inlay will be sanded flush to the peghead face.
|
|
The inlay has been sanded flat for the dramatic reveal. Just before the finishing process begins, I will hand engrave the pearl to further enhance the design.
|
|
Here I am using a "graver" to engrave some extra detail onto the pearl shell.
|
|
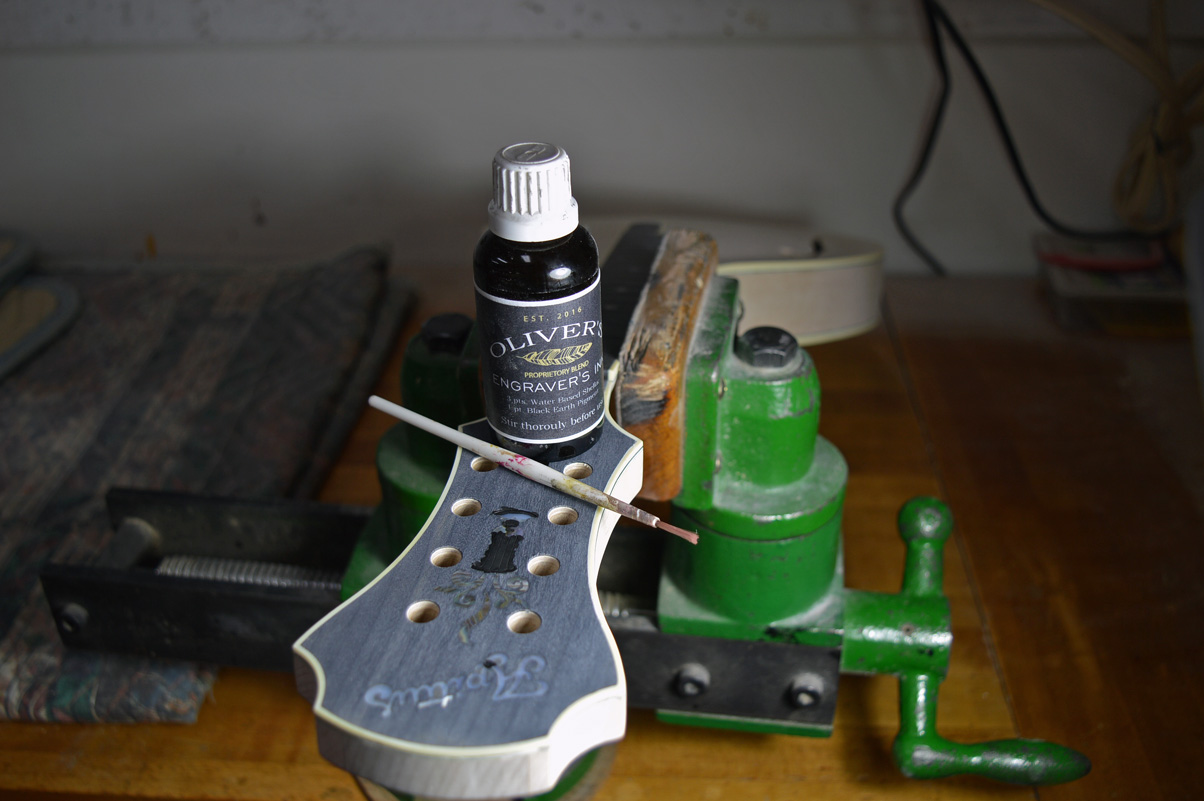
After trying many different materials to fill the engraved lines, including the traditional colored wax, I formulated my own "Engraver's Ink". It is a heavy bodied ink that fills and colors the engraved lines and once dry, it does not interfere with my finishing methods.
|
|
When the ink is dry, a light sanding with very fine sandpaper removes the excess and leaves the engraved lines filled with black pigment and binder.
|
 RGB.jpg)